March 22, 2014

Ricotta Cheese & Spinach Puff

This recipe is one of many that's been long overdue. When I posted photos of this puff on FB a couple of years back, many of my friends asked for the recipe but I hadn't got the chance to upload it on my blog until...now. Procrastination at its finest. Hehe.

I have made these puffs many times for family gatherings and afternoon tea at home. My two year old daughter and husband love them - they're easy to eat! I have also made them three times for my little one's playgroup events. I was delighted to bring home an empty container at the end of each event - it's a good sign; all the pieces were snapped up. I have been asked to share the recipe by some very nice ladies at the playgroup last week. So, that's another push for me to upload the recipe here sooner than later.

What I love abt this puff is that it is on the savory side as opposed to sweet. It contains awesome nutrients (spinach is king!), it's child-friendly and best of all it is so easy to make. I can't wax lyrical abt it without also mentioning that it makes for an impressive and yummy party spread.

Ingredients:
1kg ricotta cheese
4 large eggs
1 big red onion (diced)
1 bag baby spinach
Salt
Pepper
6 pastry sheets (follow the packet instruction for thawing)
3 tbsp olive oil
1 egg (lightly whisked with fork, for glazing)

Method:
1. Pre-heat oven to 200ÂșC. Line baking tray with parchment paper or lightly spray the tray with cooking oil.

2. Heat olive oil in a small pan. Saute diced onions over medium heat for 5-6 minutes until caramelised. Set aside to cool.

3. Rinse the spinach leaves and place them in a medium bowl. Pour hot water on the spinach to blanch it for abt 1 minute. Drain the water and run cold tap water on the spinach.  Squeeze the leaves to drain off any excess water. The spinach will shrink in size. Chop the leaves into small pieces. Set aside.

4. Lightly whisk 4 eggs with a fork in a large metal bowl. Crumble in the ricotta cheese and mix it well with the eggs.

5. Add the chopped spinach into the mixture and mix all the ingredients.

6. Add the cooled caramelised onions together with the excess oil from the pan. Mix all the ingredients well. Add salt & pepper to taste. The mixture shd be sufficiently moist. If too dry, crack in another egg and mix well.

7. Spread spoonfuls of the cheese mixture onto one pastry sheet. Leave abt 0.5cm allowance on the top of the sheet. Roll the pastry sheet from bottom up, making sure that each roll is abt 3-4cm in height (if too wide, it wont hold the cheese tightly and makes cutting up later more difficult). Wet the top edge with some water and seal the roll. Your roll should be fairly tight. Repeat with the rest of the pastry sheets.

8. Cut up the roll into small sections of abt 6 to 8cm each. Don't be too concerned if the cheese overflows or the rolls are dented (see pic); they'll "reorganize" themselves in the oven. Place the rolls onto a baking tray. Glaze them with the egg mixture and bake for 25mins or until golden brown and the pastry evenly cooked.

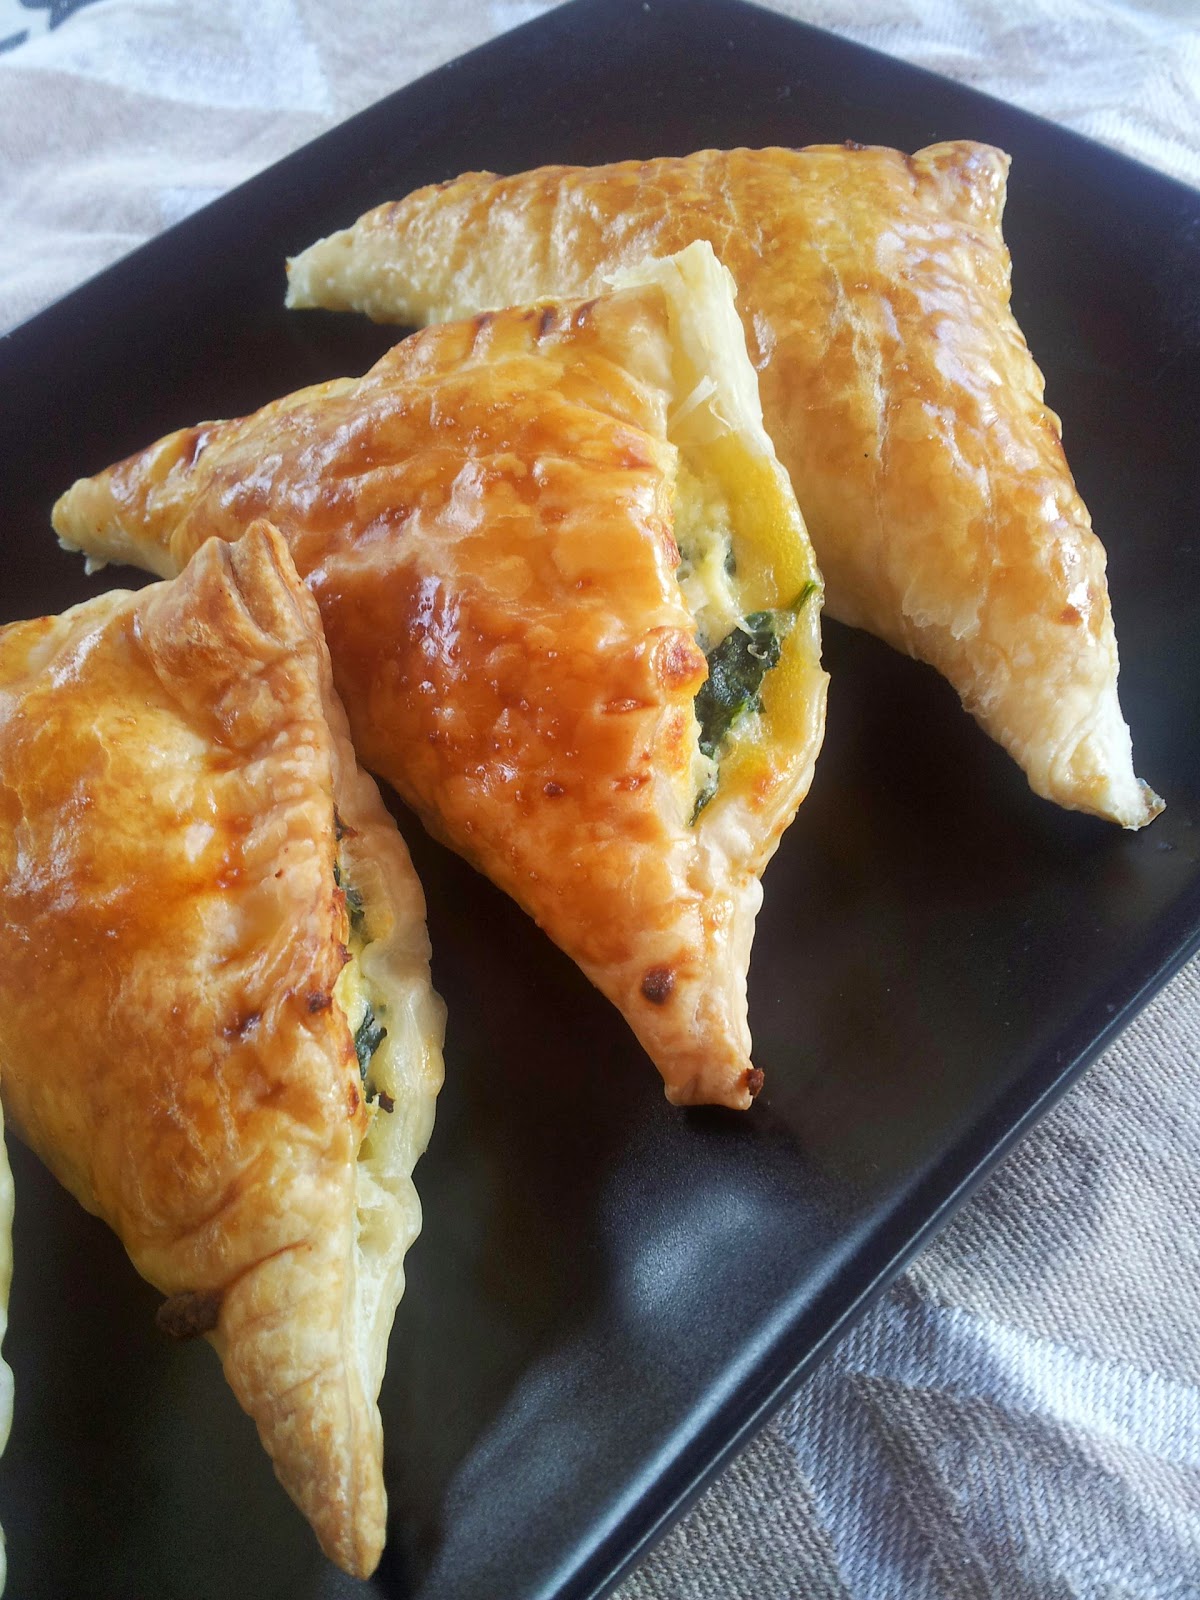
[Alternatively, the pastry can be shaped into bite sized triangles or squares instead of a roll].

March 20, 2014

Mutton Chop (Beach Road, Singapore style)

It feels good to drop by my blog, which I have somewhat abandoned temporarily in the name of other pursuits such as raising and developing my toddler - attending her playgroups and devising developmental activities at home - spring cleaning the house which is never ending and trying to finish a course, to name just a few. Despite the silence on this blog, I am still cooking. I have attempted to eat out more than before but each time I finish my meal, I will leave the eatery as a dissatisfied diner. It's hardly tasty. Thus, I'm more and more convinced that home cooking rocks. Hehe.

Cooking these days is all about quick, nutritious and yummy food as I am spending more time on my little one. Make no mistake then that I would often go thru my gastronomy memory bank for recipes I grew up with and food I adored from Singapore. I have many. Too many. This Indian fare which is a common hawker centre food in Singapore is just one of them. I had my first plate of Mutton Chop probably at 7 yrs old. On hindsight, I must have stuffed myself with excessive red food colouring often used with the meat, not to mention the recycled oil used in the frying of the potatoes by the food seller. Yikes!

Not wanting to give up on one of my fav food, I decided I could change some of the ingredients to produce a healthier version of the dish. For instance, I used olive oil for everything and completely omitted the red food colouring. I also used pasta sauce for more flavour in place of canned tomato puree and ready to fry and pre-seasoned frozen potato wedges as opposed to actual potatoes that need to be de-skined, washed and cut up in order to save on preparation time. That's the beauty of home cooking, you control what goes into your system :)

Serves 2-4
Ingredients:
For marinate
500g mutton or beef steak (diced)
4 tbsp light soy sauce
6 tbsp sweet soy sauce (kicap manis)

For meat sauce
10 tbsp tomato puree or pasta sauce
3 tbsp tomato ketchup
2 tbsp sugar (+/- based on preference)
1 tbsp chilli paste (+/- based on  preference). I used the ready to use one as pictured. In Spore "chilli boh" is commonly used and available.
2 tsp coriander powder
2 tsp cumin powder
Light soy sauce
Sweet soy sauce (kicap manis)
Oil for frying

Other accompaniments
Frozen potato wedges
Tomatoes
Cucumbers
Snow peas (blanched)
Eggs fried sunny side up

Method:
1. Marinate meat with the sauces for at least 30mins.
2. Fry the potato wedges, eggs. Set aside.
3. Heat 3 tbsp of oil in a pan and fry the marinated meat until lightly cooked. Take meat off pan and set aside.
4. Clear the pan of any left over liquid (don't discard, can add to sauce if it requires more liquid)
5. Heat 2 tbsp of oil in the pan. Add pasta sauce or tomato puree, chilli paste and tomato ketchup. Sautee the ingredients over medium heat, stirring them occasionally for abt 3-4 mins.
6. Add the light & sweet soy sauce to taste. Add the cumin and coriander powder. Stir the ingredients well.
7. Add the pre-fried meat cubes and stir the ingredients making sure each meat cube is sufficiently coated with the sauce. Let the ingredients cook for abt 3-5 mins and the sauce slightly thickened.  If too thick, add the leftover liquid from the meat. Add sugar and let it caramelise for a while before turning off the heat.
8. Adjust the taste to your liking. The sauce should be a little sweet and sourish and if you prefer, hot (spicy) as well. Add more/less sugar/chilli to taste. Serve with the rest of the accompaniments.

June 2, 2013

The Baking Story and Cupcake Therapy

I have to admit that baking is not really my strength. I have had numerous baking faux pas - sunk cake, hard rock buns, overbaked cookies...and every other baker's nightmare imaginable, you name it. I've been so tempted to bury all my baking books and equipment for good in the backyard with a stunning "RIP" tombstone for excellent measure and then wail over the depressing attestation that I wasn't born to bake. Yes, it's that bad. Pathetic, to be exact.

But in cooking, in the words of my husband, "When have you ever cooked something bad? Never." It could be true or it could be a case of him getting over-intoxicated by all the belacan (fermented shrimp paste) that I use in the Asam Pedas and Sambal, dishes which he enjoys. Honestly, he's a great fan of my cooking and I am very grateful for that.

My baking failure could have something to do with my cooking style. You see, I am the "thrower" sort of cook. Precise measurement of ingredients bore me very much. I go by "a dash of this, a sprinkle of that, a bunch of this, a handful of that". In my opinion, you can't be too clocklike in cooking, which I regard as a creative process. It is stifling. Just watch the likes of Jamie Oliver and Nigella. When they say 2 teaspoons of salt, they actually dig their fingers into the salt bowl (not spoon per se) and leave you to wonder if the universal size of teaspoons has been modelled after their hands.

Unfortunately for me, precision is quite important in baking. Two teaspoons of milk versus a gut-feel quantity of it does make a difference between getting a desirable and a doomed frosting cream, for instance. Unless you're a baking genius. So, over time, I have learnt and accepted the fact that I have to put the measuring cups, spoons, thermometers, etc to good use if I ever wanted to get re-connected with my oven and cake mixer again.

Needless to say, that change in kitchen habit I made several years ago (mainly for baking) has led to many proud baking moments. I then upped my baking ante by dabbling in cupcake decorating for sheer fun. It's a self-taught foray, after getting inspired by pictures and videos I saw on Facebook, Pinterest and Youtube. I see it as an extension of gastronomic therapy and creativity - all from the comfort of my home. Or kitchen, to be precise.

A happy ending. Or beginning. So, if you think you weren't born to bake (or cook), perservere and get inspired from everywhere. There is hope yet :)

June 1, 2013

Sushi With a Twist

When I looked at the date of my last blog post, I decided to just resign to the cliche, "How time flies!". Hehehe. I won't blame motherhood for everything - it's a wonderful journey that's filled with tons of responsibilities, joy & the occasional heartache.

The truth is, I have been spending a lot of time reading about child development and growth, researching for activities to do with my pre-toddler (and actually doing them), hunting down, organising and participating in playgroups, playgyms, playdates and any other appropriate social platforms to give her a headstart she deserves. Then there's the daily walk to the park or around the suburb, the trip to the playground and the list goes on. It all seems too much to do for a small person. I am enjoying this phase of my life, to be honest. It is exhausting (most times, what with sleep being so elusive) but I know this roller coaster ride won't last. Once gone, I can only look back at the memories. I'm digressing into melancholy, aren't I? Look at what motherhood has done to me! Did I say I wouldn't blame motherhood for everything? Right.

I haven't got much time or desire to sit in front of the PC of late. I've decided to download the Blogger app into my Samsung so I can update my blog on the go. I wish the app has more features but it's easy to use and good enough for now. Let's zoom into my kitchen.

Amidst all the motherly duties, I still make meals for my family. I need to eat well to maintain a good energy level. On days when I could only manage a simple dish, I would indulge in a visual feast. With so many talented ladies uploading pics of their kitchen adventures on Facebook and Pinterest, it's not difficult to get a constant dose of inspiration. And that's what catapulted me into making this one helluva Sushi.

It is Japanese in nature but Malay in taste. A cross-cultural adaptation, if you like. The traditional Malay Pulut Kunyit, which is served with curry used to be the centrepiece at Malay weddings. In these modern times, fancy cupcakes/wedding cake towers have taken over the limelight instead. I should have used "beras pulut" (soft rice grains) to make this dish but I used real sushi rice instead, which didn't hurt. In place of beef curry, the filling is spicy beef floss (serunding daging), which is shredded beef popular in Indonesian and Malay cuisines. Ready made ones can be bought for abt A$20 for a small tub. I reckon that's a tad too expensive for a condiment! Making it from scratch is not rocket science. Plus, I love that I could tweak the taste to my liking; I like it to be a little bit sweeter and then punch it with hotness from the chillies and tangy flavour of tamarind.

When I sank my teeth into this fusion Sushi, my feet took me to perform the Happy Dance, my eyes closed in a moment of delirium, my mouth munched away in divine deliciousness. The flossy filling is moist, sweet & spicy all at once, the rice soft & tasty and the gentle flavour of the nori seaweed just envelopes everything perfectly together. It's goodness re-defined. Ummph!

Ingredients:
(Makes 2 lengthwise sushi rolls)

For the Rice
2 cups sushi rice (wash & drain)
Water
1/2 tsp tumeric powder
Salt to taste

For the Beef Floss
300gm beef (boil, shred finely & put aside)
1 1/2 tsp cumin seeds*
1 1/2 tsp coriander seeds*
(gently heat cumin & coriander in an oil-less pan for a minute to extract the fragrance)
1 lemongrass (chop bottom half into 1cm pieces, discard the stem)*
2cm galangal*
2cm ginger*
5 dried chillies*
4 shallots*
2 cloves garlic*
1/2 cup diluted tamarind juice
2 tbsp sugar (more if prefer sweeter)
A dash of tumeric powder
Salt to taste
2-3 kaffir lime leaves
Oil for frying
Cucumber (cut 0.5cm thick lengthwise)
Nori seaweed sheets

*Grind ingredients with a bit of water to form a paste

Method:

1. After adding water to the rice, mix in the tumeric powder & salt. Give it a stir and cook rice according to packet instruction either in the rice cooker or in a pot over the stove.

2. When rice is cooked, gently comb it with a fork to mix it. It should be soft and sticky. Coat it with a bit of rice vinegar if it's not already sticky. Set aside to cool.

3. While rice is cooking, heat oil in a pan. Fry the ground ingredients & tumeric until fragrant.

4. Stir in the shredded beef. Add tamarind juice, sugar & kaffir lime leaves.

5. Cook until most of the liquid has evaporated, stirring the ingredients occasionally. Season with salt.

6. Once cooked, set aside to cool completely before preparing the sushi roll.

7. Lay a piece of nori seaweed on a sushi rolling mat.

8. Scoop rice onto the seaweed, pressing it down, leaving 0.5cm around the edges.

9. Spoon beef floss & spread on top of rice. Place 2 pieces of cucumber in the middle section.

10. Roll the sushi. Cut the sushi according to preferred thickness using a slightly damp sharp knife. Serve.

December 16, 2011

Nasi Goreng Tom Yum (Tom Yum Fried Rice)

It is a strange summer in Australia this year.  According to the met services, we're experiencing the coldest summer in Canberra in 47 years! I felt the weather reverted from Spring to Autumn instead of progressing into sunny days, with temperature hovering between 19*C and 23*C since the start of the season. Suffice to say that we still need thick woollen blankets to sleep at night.

With the cold weather comes the need for comfort food. One of my perennial favourites is fried rice.  It's one of the easiest yet tastiest complete meals to produce. The best fried rice is made with yesterday's rice.  Even better refrigerated.  I must say, fried rice is highly customisable too.  There's the Malay version, the Chinese version, the Indian version and more. I am passionate about fried rice so much so that I contributed a recipe to an international magazine some time this year and it got published - in full glossy glory (with my name on it!).  Yay!

Add any "side kick" as you wish.
I have here slices of Vegetarian Mock Duck (Char Siew) and cucumber

Fast forward to my kitchen.  I was hooked on making Chinese fried rice for several days in a row.  This followed a friend's Facebook posting of the glorious dish she had in food-loving Singapore, of course.  I must digress a little here with a small confession to make. When I run out of ideas to cook, I turn to Facebook. My countrymen have a peculiar obsession of posting pictures of their gastronomic indulgences with pride. After all, might I remind you that we're people of Makan Nation, of which eating is second only to shopping as a national past time ("makan" is Malay for "eat").  

So, back to my kitchen.  The thing about fried rice is that you must allow for the rice to cool down (if you are cooking/steaming fresh rice) to at least room temperature.  If you fry the rice while it's hot, you will get clumps, which will kill the joy of having a delicious meal. I decided to give this fried rice a little twist. I got the idea from a Malaysian friend who cooks Thai Fried Rice regularly for her Aussie husband. I put the culinary experiment on my own husband who turned out to love this version of fried rice with a passion - once again, his Western taste bud tickled towards the Asian direction!


I have tried many different kinds of Tom Yum pastes but found this one
to be the mother of all instant Tom Yum pastes! It's sufficiently spicy and sour
and it's Halal! Just add some kaffir lime leaves for more punch, if you wish.


Ingredients:
(serves 4)

2 cups rice (cooked & cooled to room temperature)
1 carrot (diced)
1/2 red or green capsicum (diced)
1 small bowl frozen corn kernels
2 cloves garlic (diced)
1/2 onion (diced)
4 seafood/crab sticks (cut into 1cm pieces)
100gm prawns
2 chicken stock cubes
2 eggs
1 tbsp Tom Yum paste
4 tbsp olive oil
Salt to taste


Preparation:

1.  Heat oil in a wok or a large frying pan.  Stir in garlic and onions, fry them over medium heat until onion is tender and fragrant.

2.  Add carrots, stir fry for 2 minutes.  Add capsicums, stir fry for 2 minutes.

3.  Add seafood/crab stick pieces and prawns.  Stir fry until prawns turn pink.

4.  Separately crush chicken cubes until crumble and add to the ingredients in the wok.  Add corn kernels and stir fry all ingredients.

5.  Add Tom Yum paste and stir for 30 seconds.  Create a well in the middle of the wok (if too dry, add 1 tsp of olive oil).  Break the eggs in the well and leave them to cook slightly for 30 seconds before stirring the eggs to break the yolk.  Leave eggs to cook for a further 20 seconds.  Do not stir the other ingredients with the eggs at this point in time (they will become clumpy).  When eggs are almost cooked, fold the ingredients together.

6.  Add rice.  Stir all ingredients gently.  Increase heat to high and stir all ingredients until rice is thoroughly coated with the paste.  Add salt to taste.

7.  Serve hot.


Fearlessly Simple & Home Cooked

December 15, 2011

A Hiatus

Oh wow! It has been that long since I last posted on this blog. Where did the time go?!

Yes, I went into a hiatus of sorts. To cut a long story short, I fell pregnant and gave birth to a sweet cutie pie in Oct 2011. It was one of the happiest moments of my life! 


My pregnancy was pretty smooth sailing. Praise the Lord! I stayed active throughout the nine months but the thought of sitting in front of the computer to blog (and getting a cramp leg or two) did not seem like an attractive option for me then. So, I decided to put the blog entries on hold (didn't realise it would be that long!) although I was still whipping up meals right up to the last week of my pregnancy.  It didn't matter that I was standing in the kitchen for longer than a pregnant woman should. I didn't have a fussy nose or nasty nausea that typically comes with the pregnancy package to refrain from food and cooking. In fact, I remained enthusiastic about trying out new recipes.  My husband picked up cooking too, especially of dishes he adored. So, on days when I felt a little off tangent (hormonally, usually), he would compassionately take over the kitchen. God bless him for his kind help!

Despite my temporary hiatus, I am heartened to see that I now have over 7,000 visitors to the blog, who hail from all over the world. Some have left me comments and emails, which I have yet to reply.  My sincere apologies.

In between my new schedule, which consists mainly of feeding my baby, changing her diaper, training her gross motor skills and learning to identify the colour and texture of errr...baby poo...I am still, guess what? COOKING! So, yes. I'll steal time to update and resurrect the blog as much as I can. While doing so, I am developing a new skill - typing with one hand (while cradling baby on the other!).  We women sometimes surprise ourselves with our multi-tasking capability, don't we (this - the men still don't get it)? 

I wish to thank you for visiting my blog! 


Terima Kasih (Malay for ''thank you'').


Fearlessly Simple & Home Cooked

December 17, 2010

Roti Prata (Indian Pancake)

Prata is so delicious (your kids will love it, guaranteed!) and flexible that
you can eat it with just about anything.  Here, I have mine with sambal
tumis ikan bilis (cooked chilli paste with anchovies)

When you think of pancake in the Western definition of the word, you would typically think of maple syrup, butter, strawberries, blueberries and even fresh cream.  I've always felt that as a breakfast food, that combination is extravagantly sweet, like a sugar rush dynamite.  I'm not quite a fan of sweet stuff, as I've mentioned before.  If you give me something chilli hot, now that will be a different story.  Yes, chilli hot in the morning.  I am a serious chilli eater and for many Asians, a savoury cooked breakfast sounds more delectable than a sugary one.  Which brings me to another type of pancake.

In Singapore, it's called Roti Prata but in Malaysia it's commonly known as Roti Canai.  Prata or Canai, it's an Indian pancake made largely from flour, butter, some sprinkles of salt, sugar, milk and other little ingredients.  Sounds easy peasy, ok. But the trick is in the kneading and flipping the dough.  I've seen Italian chefs doing some fancy pizza boomerang. Nice but that's an optional showmanship. In prata making, flipping is a key technique.  It gives the prata the ultimate post-fried crispy texture.  See video - the guy in white is a Singaporean Member of Parliament.  Told you it's no mean feat, even a honcho can't flip a prata dough! 


I'm so fond of prata that weeks before I left Singapore, my brother bought me prata with fish curry (I love it best like that) almost everyday.  In case I couldn't find prata in Australia, that daily consumption was meant to settle me into the initial period of my migration until I learned to make my own prata.  I was able to endure prata's absence from my life for about 2 months.  It was when friends started posting pictures of this nationally-loved pancake with all sorts of accompaniments (curry, dhal, sambal tumis) on Facebook and tagging me to the pictures that I decided to get into prata action.  I was glad that among the things I had packed with me to Australia were heaps of cook books (I'd stored my mum's recipes in my memory).

I made fish curry to soak my prata into. Over the years, prata in Singapore has been
revolutionised such that there's a mind boggling variety - from mushroom cheese prata
to plane prata (light and long like a paper aeroplane) 


I was quite elated when I found a modified recipe and technique that required no flipping.  Hooray! There were some extra steps to follow, no doubt.  But at least I could be sure I wasn't required to clumsily toss and flip the dough and raise my neighbour's suspicion of dangerous kitchen frisbee going on in my house.  I can safely say no animals or humans were harmed during the making of this prata in my kitchen.

I've decided to just scan the recipe page and share it with you here.  Try making your own prata.  A kilogram of flour goes a looooong prata way!


Fearlessly Simple & Home Cooked